Wednesday, 30 November 2011

Filming day one:

Work completed individually:


On Thursday, Tayla, Chloe and I started filming some of the scenes for our two minute opening film.

Equipment we took with us that day: 
  • Video camera
  • Tripod
  • Props - hazard sign and apples
  • Makeup & Costume
  • Money
  • Refreshments
  • Storyboard sheet
  • Phone - to take pictures
Who was present:
  • Tayla 
  • Chloe
  • Annie Lock - actress 
  • Ellie Weeks - our friend, who decided to come along with us and do the makeup for Annie, she also looked after our bags whilst we were filming
  • Me 
What happened on the filming day:
  • We all brought in our stuff for filming on that morning - Tayla brought in the video camera, tripod, the cardigan and headband for the costume, Chloe brought in her makeup, fake blood that she made and hairbrush, and I brought in the hazard sign, storyboard, dress for the costume - I was supposed to bring in a knife for filming, but because of health and safety issues, I ended up not bringing in the knife to school, and in result, there will no longer be the knife scene.
  • During our free period, Tayla and I walked up to the shops to buy some apples for the filming for later, we brought two packets of apples.
  • At lunch, we started to prepare for filming - making sure the video camera was fully charged (we should of checked that in the morning..), making sure we had not forgotten something etc. 
  • Annie got changed into the 'Snow White' outfit, and Ellie applied makeup on her and backcombed her hair.
  • We walked over to the Nicky Line - we changed the location pretty much last minute because we had no transport of getting to Ashridge, and it was getting dark early, so it would have been safer to film in a place near to where we live. 
  • We started filming straight away at about 2pm, and thankfully it was not windy or freezing cold which could have potentially ruined our filming. 
  • At about 4, we finished filming
Overall thoughts:
  • I thought the filming went well overall, as Annie was able to portray the character Snow White well, she also didn't mind running around barefoot on the muddy ground. 
  • The weather was pretty good that day, it wasn't windy, dark or rainy when we filmed, which didn't delay filming.
  • We worked well as a group although there were some disagreements in some places, but overall filming went well. 
  • I was glad Ellie was able to come along, as our bags were looked after when we were filming with Annie, and Ellie did Annie's makeup when some of us went over to the Nicky Line to set up the equipments, tripod and video camera. 
  • Lastly, I think we could have been more organised on the filming day, for example, planning on transport to Ashridge - but Nicky Line was a better location in a way as we were still in Hemel and I live only a few minutes by it so we were more familiar with the location, having the props ready - apples, without having to buy them on the filming day, but luckily we had a free lesson that day. 

Fake blood that Chloe made
Ellie doing Annie's hair and makeup
Annie's overall look for Snow White
Nicky Line on the filming day 

Hazard sign 
Annie preparing to run
Apples laying on the ground 
Video camera focussing on the surrounding of the location

Sunday, 27 November 2011

Update:

Just to update, we have started filming, and I will be typing up filming day one soon, which hopefully will be posted up soon! 

Animatics part 1:

Completed work individually:


On the monday lesson we had last week, we started to experiment and use animatics - this gives us an idea on how our final piece will look like.


What application did we use:
  • Final Cut
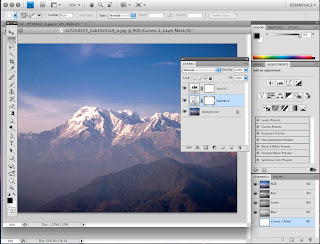
  • Photoshop
What we did: 
  1. Scanned in the storyboard
  2. Use photoshop on the iMacs to edit the sketches - colouring them in, darkening the lines etc. 
The result: 
  • Because we had not finish the editing process of the sketches, we haven't seen how the animatics look yet. 
  • We did start experimenting with Final Cut, and imported some of the completed edited sketches into the application. 
An example of Final Cut on the mac
An example of photoshop on the mac

Friday, 18 November 2011

Finalising costume:

Completed work individually:

Today Tayla and I brought in clothes for the costume which will be worn by Snow White. Because I couldn't find a red top, I brought in a red dress instead and we have decided to team that up with Tayla's white cardigan and now the costume has changed again to:
  • Red dress
  • White cardigan
  • Blue headband/flower
  • Black tights
  • Yellow or dark blue shoes
Below are the pictures of the costume that will be used for filmimg:

Caterina holding up the final outfit
White cardigan
Red dress
Why we have chosen this particular costume?
  • Fitted into the description of the overall look of Snow White - stereotypical colours that will allow the audience to recognise and ressemble the character with Disney Snow White.
  • This is an alternative of the stereotypical look of Snow White as this outfit looks mordern in contrast to the Disney Snow White. Additionally, this differs to the original princess outfit to connote to the audience that she isn't pure, and innocent like a stereotypical princess, allowing the audience to know she has a bad side to her.
  • The red on her dress will give a link to the apple, as the apple is red too - this will allow the audience to recognise a link between the two.
  • The red symbolises energy, power and blood which will connote across to the audience that she is confident and fiery, however, the white cardigan suggests innocence, purity and simplicity which is the opposite to the red. This will suggest to the audience she has two different personalities.
  • The ruffled part of the dress suggests a feminine Snow White
When will we use this?
  • When we are filming - Annie will be wearing this costume
Overall, I am happy with the costume, and hopefully the filming will go well!

Thursday, 17 November 2011

Location scouting part 2:

Completed work individually:


Tayla and I decided to go to our second chosen location to take some pictures of it to show where we will be filming. We have chosen the swimming changing rooms:

Why?
  • Fits into the appearence of the room described in the film - isolated, dirty and old looking 
  • Permission - we were given permission by one of the PE teachers to use the room for filming
  • No distraction - no school posters or tables lying around the room etc.
When will we film this?
  • Next Tuesday after school
What is this location used for?
  • This location will be used for the "inside of the shed" as all of our Sheds have no room for filming in and this location looks like an inside of a shed if we edited the walls into a brownish colour
Lighting in the room
The door from the inside
How the room looks like
Tayla standing at the angle/place where we will be filming in the room
With slightly more light - this is a shot when the door was opened on the right hand side to allow sunlight in
The sign - will be covered up for filming
Outside of the location
The other location would Tayla's shed at her back garden:

Why?
  • Fits into the descrition of the shed in our film
  • Tayla will be able to film there whenever she wants as its her shed
  • No distraction - no one interrupting or posters around
When will we film this?
  • Friday 18th November 2011
What is this location used for?
  • The scene with the shed will be used for the scene where the camera will zoom into the window and looking through it seeing Snow White.

Making the hazard sign part 2:

Completed work individually:

Yesterday, during our media lesson, Tayla and I decided we would finish off the hazard sign that I had started off a while ago, below are the pictures of process of making it. The hazard sign will be used for filming next week. 


Final finished product

Final product

Wednesday, 16 November 2011

Action Plan - Week 6:

For this week, we have decided individually that we will:

  • Chloe - finishing off her costume and making blood
  • Tayla - filming her shed for one of the scenes in the film
  • Me - finishing off the hazard sign and storyboard 
We will all be blogging and updating as much as possible


Tuesday, 15 November 2011

A discussion in class on what we should take when filming

Health and safety:

Work completed indivually

Here are the health and safety issues that I have considered when we do use a knife for filming:

Problem:
  1. High risk of potential harm
Solution:
  1. Make sure knife is put away safely and not left lying around which could lead to harm to anyone
  2. Carry the knife with the blade facing downwards - this will reduce the chance of hurting another person when walking around with the knife
  3. Only take out the knife when using it - this will reduce the chance of harming to one
  4. Store the knife into a safe place
  5. Do not play around with the knife
  6. Do not carry it in your pocket

Finalising the filming times:

Work completed individually

I know that I've posted up "final filming dates/scheduling" etc.before, but some of us couldn't film on some of the days, and most importantly, Annie wasn't able to film on the Thursday, so we had to delay the filming, and below are the new times that we will be filming:

22/11/11 and 24/11/11 : We will be going to Ashridge to film with Annie
16/11/11 or 17/11/11   : Tayla will be filming one scene - her shed as she is the only one who is free during one of these days between me and Chloe.
25/11/11                       : We will be recording a voiceover using iMovie

Recording our voices:

Work completed individually

On monday, Chloe, Tayla and I borrowed a microphone off the school and decided to record our voice-over for our film. When we got the microphone we realised there was a few problems:
  1. There was no battery
  2. When we did plug it into the school computer, we had trouble finding what software to use for recording
  3. We couldn't find a software to use for recording
What we actually ended up doing?
  1. I had to go home and bring my laptop into school, so we can find a software to use when recording
  2. Bringing in batteries ..
Outcome:
  1. When we did put batteries into the microphone, the mic was still not working, so we decided to ditch the microphone and use the microphone on my laptop.
  2. We used iMovies on my laptop - a software - to record, but we had to record whilst a film was playing as it was supposed to be a "voiceover", so therefore, we videoed a short clip in photobooth, and exported it over to iMovies to record a voiceover - which ended up successfully.
How will we record our voiceover for our film?
  1. We have decided that we will record our voices after filming as we know how to use iMovies, and it will be easier in a way, as then we will know how fast or slow we should talk whilst the film is playing.
  2. iMovie also allows us to add text and sound effects onto a film, so this will allow us to add credits into the film and certain sound effects at certain scenes in the film.
iMovies

Photobooth


Lighting:

Work completed individually

For todays lesson, we were taught on how to use different and specific colours - rainbow colours - to achieve the "white" lighting look in films, for example, if a room had yellowy lighting, by using a piece of blue paper and using the "white balance tool" on the camera and focus onto the paper for a while, the room will magically appear brighter and whiter on camera, and this helps set the atmosphere and mood of a particular scene, without having to depend on lighting and weather etc.

Rainbow coloured spectrum

The picture below, shows a before and after shot of using the "white balancing tool" and blue paper, on the left hand side, we can see a shot with yellow lighting, and on the right hand side, we can see an improved version of the shot with whiter lighting. The shot on the right hand side, creates a more refreshing feel with a cleaner look in contrast to the one on the left hand side, moreover, the improved version looks more proffessional and the balloons and objects stand out more.

Before and After shot of using "white balance tool"

How will today's lesson help me when filming?
  • Considering what lighting to use - how it will create a specific atmosphere and mood to the audience
  • Experiment with the tool, and see which lighting is suitable for which scene


Monday, 14 November 2011

Success Criteria for an evaluation:

Work completed individually

For today's lesson, we were given a success criteria for the evaluation in which we had to put in order of importance. Me and Emma Gower worked together for this, and decided on we thought was the most important when analysing our work. 

I thought today's lesson was very useful as we were given a success criteria on what to include in our evaluation. Additionally, it will help and guide me through when writing my evaluation, on what to include and how to achieve a good grade!

Order of the importance when evaluating our work
For the second half of the lesson, we were evaluating and marking a piece of existing coursework. We watched a 2 minute opening from a media student from last year, and we had to mark on what we thought was good and what we thought needed improvement, below is a picture of my marking on the film "Invisible boy". 

Marking "Invisible boy"

Wednesday, 9 November 2011

Sound effects:

Here are some sound effects analysed by Tayla Powell as she was responsible for looking into sound effects 


I searched on YouTube and found some sound effects and music which we will be interested in using. All sound effects and music are from the same user. We will also record our own sound effects which I was not able to find online, here are the sound effects will will eventually record ourselves:
  • A heavy breathing sound effect which will be played while Snow White is running through the woods
  • A recording of someone biting into an apple which will be played when a black screen is shown which is within the first 2 minutes.
  • We will write a script which the character Snow White will say while the opening begins. The script will be similar to the film 'Snow White and the Seven Dwarfs' in the scene where snow white is talking about the poisoned apple.


Here are the sound effects i found online:


Snow White's Voice:
Where will this be used: Nicola, Chloe and I will get the person who we have chosen to play Snow White and design a script which will summarise the whole Snow White children fairytale however, this will mainly focus on the red apple. We will get the character to talk the script which we will use some inspiration from the film 'Snow White and the Seven Dwarfs' (video below) which is the scene 'The Poisoned Apple.' The character we have chosen will be talking while the scene has just opened and there is a view of an establishing shot. We hope this creates a tense yet, seedy feel to the beginning of the movie.


Door Creaking:
Where will this be used: Snow White will work out of the room which will create the door to creak.


Music:
Where will this be used: This can be used as background music while Snow white throws the mirror.


Fast-paced foot steps:
Where will this be used: Snow White will be running through the woods.


Mirror smashing:
Where will this be used: Snow White will aggressively throw the mirror onto the floor.


Opening music:
Where will this be used: This music will be played within the opening of the 2 minutes. I really like this music for our concept as it begins with a child-like sound which can relate to our child-like character, however, the song has a twist to it which is similar to our opening. This music is extremely daunting and up-rising which is what attracts me to this and how it begins and starts with the same music. This music is from the famous movie 'Dead Silence' which i have asked permission to use.


Asking for permission:
I asked the YouTube owner if i could borrow this music sound track.
All the sound effect posts, i have created individually and will shortly discuss with my fellow team members which they will give suggestions on the music and sound effect ideas i have gathered.

Analysis of the film title:

Work completed individually


Film title:

Work completed individually:

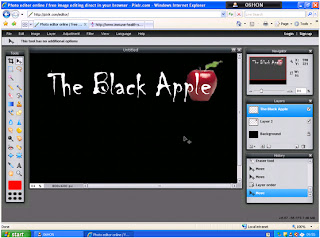
Today, Chloe, Tayla and I decided to create our film title, for this we decided to use pixlr.com as we have used this online version of photoshop previously for our film institutional logo design, and all of us have used it before in our GCSE courses.


Pixlr.com
 How we created it:
  • Once on the page of http://pixlr.com/editor/ we click into "open photo editor" and then click into "create a new image"
  • Once we have clicked into "create a new image" a box appears for us to adjust the size of the page we would like to use - we altered the sizes to a 400 by width and 360 by height and then click "okay"
  • First, we clicked on to the fill button at the side and below, we selected the colour black and filled the page in black.
  • After that, we clicked onto a text box at the left hand side of the page and entered in the text "The Black Apple"
  • Following after, we played around a little before finding a font that looked similar to the font I have sketched out in my plan
  • We chose the colour white from the colour palette as said in the plan - to stand out against the black background
  • After that, we decided to add an apple to the film title as the text itself looked quite dull and because it was in black and white, it didn't really look like a fantasy film as the colours black and white typically represent thriller and horror genres.
  • We googled "red apple" on google images, and selected a picture we wanted to use in our film title, because we could not directly copy and paste the picture into pixlr, we had to copy and paste the URL into the "Open Image URL"
  • We moved the apple around, and see where we wanted, and at the end we decided we wanted the apple to be behind the text, and let the text stand out from it.
  • We did this by simply dragging the "apple" layer above the original layer - the text and the background and ta-da the apple sits behind the text!

The final look of the film title!

Draft of creating the film title

Work completed individualluy

During my free period, I decided to sketch out how I wanted the final film title to look like, and below are some pictures of the rough sketch and analysis I did. 

Outcome
Analysis
Analysis
Analysis
Analysis
After showing and discussing with my group, we decided that we will go ahead and use pixlr.com to create a film logo similar to the one I have sketched out.